Showing posts with label Side Dishes. Show all posts

Saturday, June 9, 2012

Champagne Feta Risotto

Here is an oldie, but goodie.  I was going to just update with a new, better picture but I ended up deleting the post in the process somehow.  GAH!  Anyway, it is delicious and I hope you try it!  It is a family favorite!


Champagne Feta Risotto

1/3 cup water
1/2 teaspoon dried basil
2 (16-ounce) cans fat-free, less-sodium chicken broth
1 tablespoon olive oil
1 cup chopped onion
1 cup Arborio rice or other short-grain rice
1/2 cup Champagne or white wine
2/3 cup (about 2 1/2 ounces) crumbled feta cheese
1/4 cup (1 ounce) grated fresh Parmesan cheese


Bring the first 3 ingredients to a simmer in a medium saucepan (do not boil). Keep warm over low heat.

Heat oil in a large saucepan over medium-high heat. Add onion, and sauté 3 minutes. Add rice; sauté 2 minutes. Stir in Champagne; cook 1 minute or until the liquid is absorbed. Stir in 1 cup broth mixture; cook for 5 minutes or until liquid is nearly absorbed, stirring constantly. Reduce heat to medium. Add remaining broth mixture, 1/2 cup at a time, stirring constantly until each portion of broth is absorbed before adding the next (about 25 minutes total). Stir in feta. Sprinkle each serving with Parmesan cheese.

Summertime Tortellini Pasta Salad


Summertime Tortellini Pasta Salad

19 oz. bag cheese filled tortellini (I prefer the tri-colored)
Small Container Grape or Cherry Tomatoes, cut in half
4 oz. can sliced black olives
1/2 large yellow bell pepper, diced
1/3 c. red onion, diced
1 c. Zesty Italian Dressing
3/4 c. freshly grated Parmesan
2 Tbsp. fresh parsley, minced

Cook cheese tortellini according to package directions.  Drain and rinse under cold water.

Combine all ingredients in a large bowl.  Cover and refrigerate at least 2 hours until chilled through.  

Enjoy!!

Linked to Weekend Potluck...check it out for lots of delicious recipes!

Sunday, June 3, 2012

Onion Strings


Here is a delicious and easy side dish splurge that my family never seems to tire of.  They are SO much better than onion rings any day of the week!  


Onion Strings

1 whole Large Onion
2 cups Buttermilk
2 cups All-purpose Flour
1 Tablespoon (scant) Salt
1/4 teaspoon (to 1/2 Teaspoon) Cayenne Pepper
1 quart (to 2 Quarts) Canola Oil
Black Pepper To Taste

Slice onion very thin. Place in a baking dish and cover with buttermilk and soak for at least an hour.

Combine dry ingredients and set aside.

Heat oil to 375 degrees.

Grab a handful of onions, throw into the flour mixture, tap to shake off excess, and PLUNGE into hot oil. Fry for a few minutes and remove as soon as golden brown.

Repeat until onions are gone.

Serve plain, on salads, burgers, steaks, you name it!

Tuesday, July 26, 2011

Rice Pilaf

Side dishes are something that I typically do not pay enough attention to.  At our typical family meal, I often spend all the time and creativity on the main dish.  As a side, we so often have plain white rice, baked or mashed potatoes, or crusty bread.  Those are all things we enjoy, but everyone needs to spice things up sometimes.  When we go out to eat, I often find that my husband and I enjoy getting rice pilaf as a side, so I thought I'd give it a go!  As you know, I'm not much for boxed mixes typically, so this is from scratch.  It is very easy and delicious though!  Give it a try!  I bet most of you even have most everything you need sitting right there in your kitchen!  
Here are the ingredients that you need (do you like my monstrous bag of rice?):


Rice Pilaf
2 tablespoons butter
1/2 cup orzo pasta
1/2 cup diced onion
2 cloves garlic, minced
1/2 cup uncooked white rice
2 cups chicken broth

Melt the butter in a lidded skillet over medium-low heat. Cook and stir orzo pasta until golden brown. Stir in onion and cook until onion becomes translucent, then add garlic and cook for 1 minute. 

Mix in the rice and chicken broth. Increase heat to high and bring to a boil. Reduce heat to medium-low, cover, and simmer until the rice is tender, and the liquid has been absorbed, 20 to 25 minutes. 

Remove from heat and let stand for 5 minutes, then fluff with a fork.

Source: allrecipes

Wednesday, July 20, 2011

Spring Peas with Pancetta

I don't get around to posting many side dishes on here, especially vegetables.  I tend to just wing it when it comes to our veggies and I rarely take the time to take pictures.  This turned out very good, although I admit I upped the pancetta.  I think that next time I will keep it to 2 oz. though.  


Spring Peas with Pancetta 

3 slices pancetta, chopped (I used an entire 4 oz. package, 2-3 oz. would have been plenty)
3/4 cup finely chopped white onion
1 garlic clove, minced
3 cups shelled green peas or frozen petite green peas
1 cup fat-free, less-sodium chicken broth
2 teaspoons sugar
1/4 teaspoon salt
1/4 cup chopped fresh flat-leaf parsley

Heat a large nonstick skillet over medium-high heat. Add pancetta, and sauté 5 minutes or until crispy. 

Remove pancetta from pan, reserving drippings in pan. Add onion and garlic to pan; sauté for 2 minutes or until tender. Add peas, broth, sugar, and salt to pan. Simmer 5 minutes or until the peas are tender, stirring occasionally. Stir in pancetta and chopped parsley.

Source: Adapted from Cooking Light

Wednesday, June 29, 2011

The Best Potato Salad

Potato Salad.  Everyone has a recipe, right?  When I saw this particular one, I was intrigued.  It has a very odd ingredient combination.  I went back and forth about trying it and I almost stuck with one of my more safe recipes.  Well, you know me, I can't resist trying out something new so I went for it.  You know what?  The weird combo works!  It really does!  My husband is not a big fan of potato salad, and even he commented on how good it was.  I know adding pepperoncini's seems weird, but it is absolutely essential.  It really gives the potato salad the extra something that is usually missing.  The black olives I could take or leave.  If you are a fan, add them.  


The Best Potato Salad

6 eggs
10 red potatoes
1 cup mayonnaise
1/2 cup ranch dressing
1/3 cup dill pickle relish
2 tablespoons prepared yellow mustard
1 1/2 teaspoons salt 
1/4 teaspoon ground black pepper
1/8 teaspoon paprika
1/8 teaspoon celery seed
1 onion, chopped
1/4 cup pepperoncini 
1/4 cup sliced black olives (optional)

Place the eggs into a saucepan in a single layer and fill with water to cover the eggs by 1 inch. Cover the saucepan and bring the water to a boil over high heat. Remove from the heat and let the eggs stand in the hot water for 15 minutes. Pour out the hot water; cool the eggs under cold running water in the sink. Peel and chop the cooled eggs.

Place the potatoes into a large pot and cover with water. Bring to a boil over high heat, then reduce heat to medium-low, cover, and simmer until tender, 15 to 20 minutes. Drain and refrigerate until cold. Peel and cube once cold.

Stir together the mayonnaise, ranch dressing, relish, mustard, salt, pepper, paprika, and celery seed in a mixing bowl. Add the eggs, potatoes, onion, pepperoncini, and olives; stir until evenly mixed. Cover and refrigerate at least 2 hours before serving.

Source:  Allrecipes


Monday, May 9, 2011

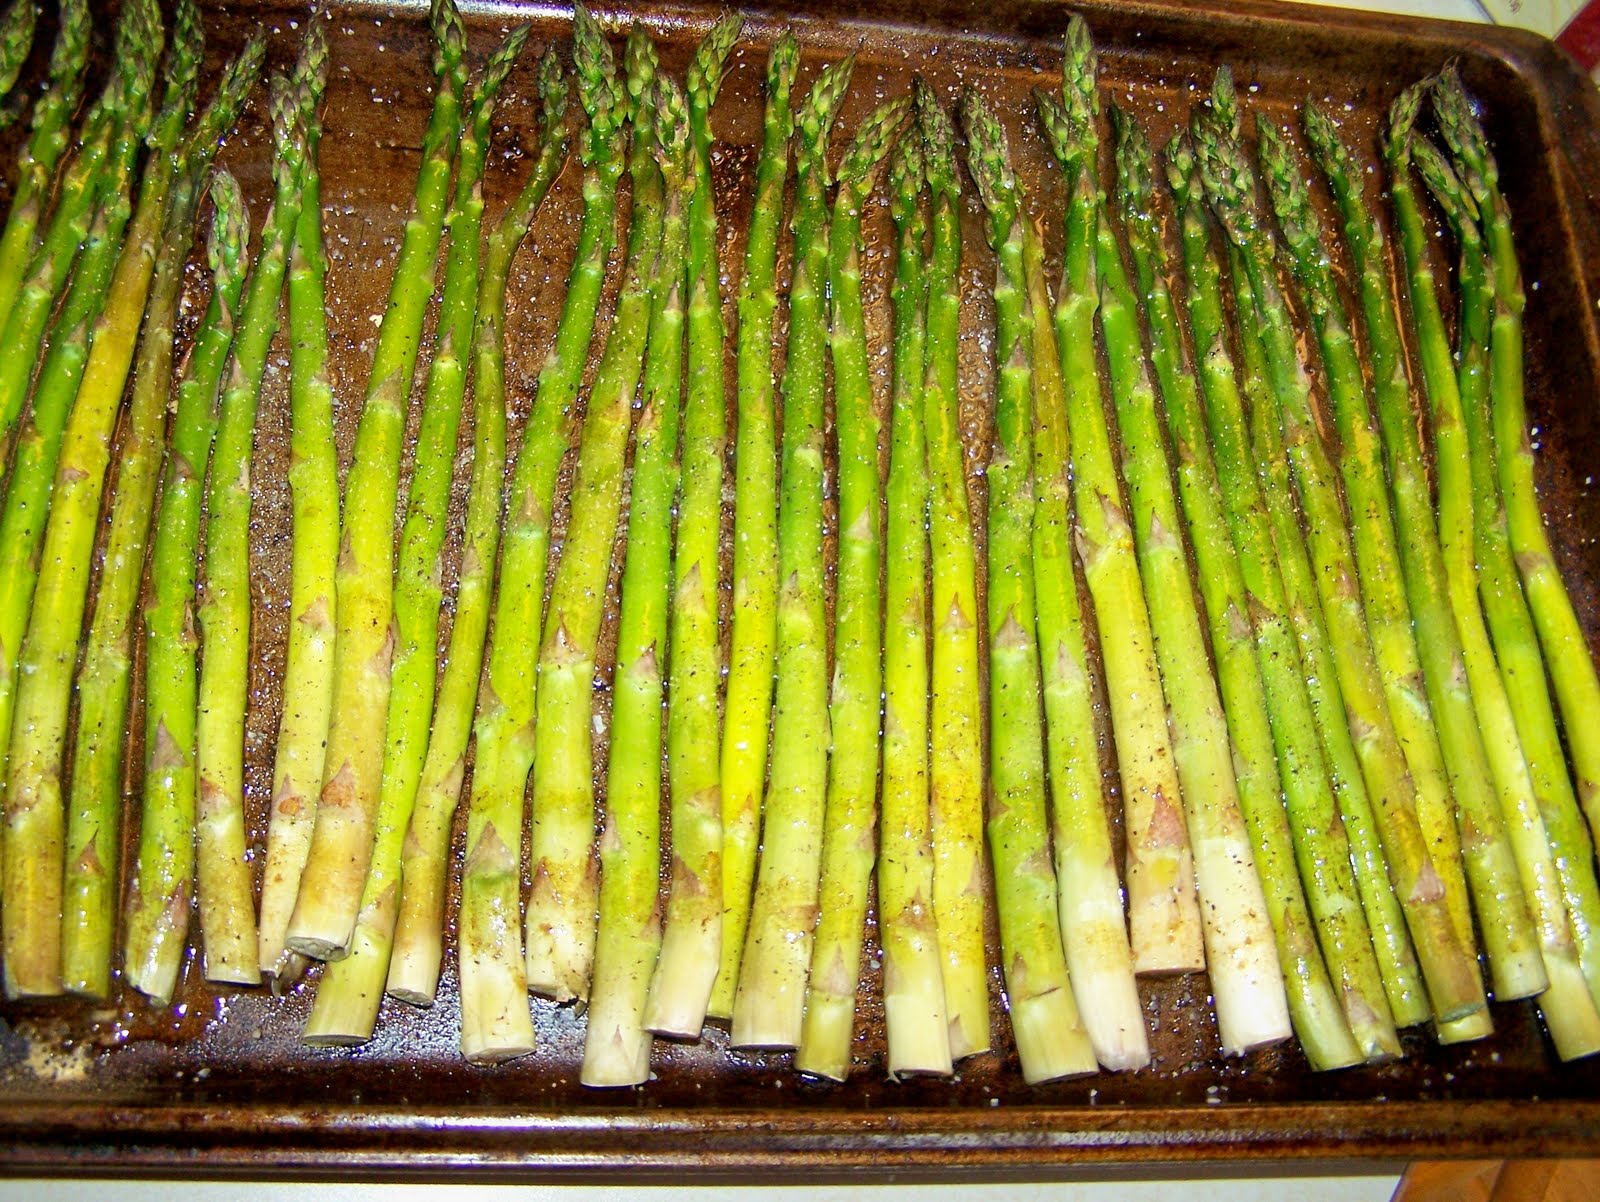
Roasted Asparagus with Balsamic Browned Butter


Look at me posting a healthy vegetable!  Are you proud?  This is the asparagus that I served alongside the Skillet Chicken Breast Aglio e Olio last week.  They were absolutely delicious together.  This asparagus is such a simple side dish.  I know I will be making it again.  I am sure that some of you (that don't live in ND) even have asparagus in your gardens right now to use!  Speaking of gardens, I have been busting my rear on mine! I will try to get some pics up here tomorrow to share!

Oh, and before you get too misty-eyed over my good girl side, please know that I am baking up a Chocolate Swirled Banana Bread as I type this;)  


Roasted Asparagus with Balsamic Browned Butter

40 asparagus spears, trimmed (about 2 pounds)
Cooking spray
1/4 teaspoon kosher salt
1/8 teaspoon black pepper
2 tablespoons butter
2 teaspoons low-sodium soy sauce
1 teaspoon balsamic vinegar

Preheat oven to 400°.

Arrange asparagus in a single layer on baking sheet; coat with cooking spray. Sprinkle with salt and pepper.

 Bake at 400° for 12 minutes or until tender.

Melt the butter in a small skillet over medium heat; cook for 3 minutes or until lightly browned, shaking pan occasionally. 

Remove from heat; stir in soy sauce and vinegar. Drizzle over the asparagus, tossing well to coat. Serve immediately.

Source:  Cooking Light

Wednesday, May 4, 2011

Layer Salad

I just can't wait a day longer to post this recipe.  My grandpa K. came for Easter and throughly enjoyed this.  Before he left, I asked if he wanted any of the leftovers and this was the only thing he came out and asked for.  My dad called me a couple days later to let me know he was raving  about it and he wants the recipe, he thinks he would like to live on this salad alone.  So here you go grandpa!

I am sorry for the picture.  You see, I went to 3 different stores looking for a pretty glass triffle dish large enough for this salad and I couldn't find a thing.  I was even willing to go with a large, plain glass bowl and still no luck.  What you see below is the top portion of my cake storage container.  Nice, huh!  As you can see I kept it very  fancy for our Easter dinner!

This layer salad is something that I grew up eating.  My grandma W. (who did not love to cook) made this for pretty much ever special occassion back in the day.  I looooooved it.  I was a stinker though, I remember scraping off the top portion and skipping the lettuce all-together.  Pretty soon, all grandma would have left of her pretty salad was the lettuce!  I was a weird child.  Now, I find I prefer to eat all parts of the salad.  


Layer Salad

SALAD:
1-2 heads Iceberg Lettuce, Chopped (I only used one)
8 ounces, fluid Baby Spinach, Washed And Dried
Salt And Pepper, to taste
8 whole Hard Boiled Eggs, Chopped
16 ounces, weight Bacon, Cooked And Chopped
4 whole Tomatoes, Chopped
1 bunch Green Onions, Thinly Sliced
8 ounces, weight Cheddar Cheese, Grated
1 bag (10 Ounce) Frozen Peas, Partially Thawed

FOR THE DRESSING:
3/4 cups (Real) Mayonnaise
3/4 cups Sour Cream
1 1/2 Tablespoon Sugar (more To Taste)

In a clear glass bowl, layer salad ingredients in the order they appear above, concentrating ingredients around the perimeter of the bowl and filling in the center with lettuce, if needed. End with the layer of peas.

Combine dressing ingredients in a separate bowl and mix well. Pour over the top of the peas and spread to cover, bringing dressing all the way out to the edges of the bowl.

Cover and refrigerate for up to 12 hours. Toss just before serving.

Source: adapted from Pioneer Woman

Tuesday, May 3, 2011

Refried Beans Without the Refry

Let me be frank.  I made this recipe a while back when I made Simply Perfect Enchiladas.  The reason I didn't post the recipe is...well...they just look so unappealing.  Is there really any way to make mashed beans look pretty?  I suppose if I would have topped them with cheese, that would have helped.  The truth is, this is my plate and after the enchiladas, I felt a little guilty about consuming any more cheese;)  I decided the beans needed to be shared, even though they are not the prettiest because they are very good and SO darn easy.  You just throw everything in the crockpot ahead of time, and you are ready to go!  Without actually refrying them, you have an easy and healthy side dish for a Mexican meal.  Homemade refried beans are also so much tastier than the canned ones!  Enjoy them with your Cinco de Mayo feast this Thursday!


Refried Beans Without the Refry

1 onion, peeled and diced
3 cups dry pinto beans, rinsed
1 fresh jalapeno pepper, seeded and chopped
2 tablespoons minced garlic
5 teaspoons salt
1 3/4 teaspoons fresh ground black pepper
1/8 teaspoon ground cumin, optional
9 cups water

Place the onion, rinsed beans, jalapeno, garlic, salt, pepper, and cumin into a slow cooker. Pour in the water and stir to combine. Cook on High for 8 hours, adding more water as needed. Note: if more than 1 cup of water has evaporated during cooking, then the temperature is too high.
Once the beans have cooked, strain them, and reserve the liquid. Mash the beans with a potato masher (I like to throw them in my kitchen aid mixer and let that do the work for me), adding the reserved water as needed to attain desired consistency.

Source: allrecipes

Thursday, April 28, 2011

Grownup Mac & Cheese

Last night, I made one of the best macaroni and cheese recipes that I have ever eaten.  Seriously.  One of my best friends posted this recipe in her facebook notes ages ago, along with lots of other deliciousness.  Every once and awhile, when I think of it, I page through her notes and steal her fantastic recipes;)  I'm not sure why I haven't made this one before, but I am glad that I found it.  I will say, my kids weren't as big of fans of this as the adults were.  I also say that their opinions don't count though, since all they really want me to do is start buying Kraft Mac & Cheese again and it is the standard against which they judge all others.  Enjoy & THANK YOU Jen!

Here is what you will need


Please note that I doubled this recipe for my family.  The pictures above are of the doubled recipe.  

Grownup Mac & Cheese

8 oz. cavatappi (can use macaroni)- I used mini Penne
3 1/2 Tbs. butter (divided)
1/4 cup finely chopped shallots
2 Tbs. flour
1/2 cup dry white wine
3/4 cup chicken broth
2/3 cup heavy whipping cream
7 oz. grated gruyere (I used Fontina which was delicious also)
3 oz. grated aged gouda, smoked gouda or romano (I went with smoked gouda...because I'm obsessed with it)
2 Tbs. minced fresh chives
1 Tbs. Dijon mustard
1/2 tsp. coarse salt (divided)
1/8 tsp. cayenne (more if you like it spicy!)
1/4 tsp. nutmeg
4 oz. (1/4 loaf) crusty sourdough bread, torn into large pieces

Preheat oven to 400.

Cook pasta until al dente in salted water, drain but do not rinse.

In large frypan, melt 2 Tbs. of the butter over medium-high heat. Add the shallots and cook until they're light golden - about 3 minutes. Sprinkle in the flour and cook & stir another minute. Add wine & broth, then cook & stir, scraping up the yummy browned bits. Add cream, stir well. Add the grated cheeses, one handful at a time, stirring each handful until melted. Stir in the chives, mustard, 1/4 tsp. of the salt, the cayenne & nutmeg. Stir pasta into this mixture, and dump it all into a 2-qt. baking dish.

Place the broken sourdough pieces, the remaining 1 1/2 Tbs. butter and the remaining 1/4 tsp. salt into a food processor. Pulse until it becomes coarse crumbs. Sprinkle this on top of the pasta, pop it into the oven, and bake 20 minutes until bread is lightly brown & crunchy and cheese is bubbly.

Serves 6

Source: Jen P.

Friday, April 22, 2011

Egg Rolls

Happy Earth Day!  On a day like today, I am reminded about how far I have yet to go in being a caring steward of my children's land.  I am thankful that many more people seem to realize that changes need to be made.  I have am always trying to slowly implement positive changes.  This summer, I hope to start composting.  One of my #1 changes that I would personally LOVE to see more people make, is reducing their use of plastic.  Those "convenient" plastic packages and bags are something that, not so conveniently, will stay on this plant long after you yourself are gone {possibly forever in some form}.  I'm not sure there was ever a worse invention.  Do your research on the subject, you will be appalled.  The thing that initially sickened me the most is what it is doing to remote parts of our oceans.  Very scary indeed.  Fortunately, every little change we make helps a little!  Change is a slow process so do 1 positive thing at a time and you will find that being more environmentally friendly isn't hard at all!

Cooking from scratch is not only an environmentally sound practice, but good for your health as well.  While I fully recognize egg rolls are NOT good for me, I also know that these homemade ones pictured below are made with a handful of ingredients that are not actually all that bad.  We have always loved to have egg rolls with our Chinese food but aside from not tasting as good as homemade, all those individual packaged egg rolls sicken me in their little plastic sleeves.  That is the kind of waste that makes my stomach turn, and is one of the many reasons that I avoid the premade freezer foods.

You will find that I DO typically use a couple of convenience items in these egg rolls, namely, bagged coleslaw mix & premade egg roll wraps.  Remember, baby steps.  I am often pressed for time when I am making these and I just don't reasistically have time to make my own egg roll wraps.  I do sometimes buy a head of cabbage instead, it just depends on how much prep time I am going to have.


Delicious & Easy Egg Rolls 

1 pound ground pork
2 teaspoon ground ginger
2 teaspoon garlic powder
1/2 tsp. salt
1/2 tsp. white pepper
1 quart peanut oil for frying
2 tablespoons all-purpose flour 
2 tablespoons water
3 1/2 cups shredded bagged coleslaw mix
10-12 (7 inch square) egg roll wrappers
2 tablespoons sesame seeds (optional)

Season pork with ginger and garlic powder and mix thoroughly. Heat mixture in a medium skillet, stirring, until pork is cooked through and no longer pink. Set aside.

In another large skillet heat oil to about 375 degrees F (190 degrees C) or medium high heat. While oil is heating, combine flour and water in a bowl until they form a paste. In a separate bowl combine the cabbage, carrots and reserved pork mixture. Mix all together.

Lay out one egg roll skin with a corner pointed toward you. Place about a 1/4 to 1/3 cup of the cabbage, carrot and pork mixture on egg roll paper and fold corner up over the mixture. Fold left and right corners toward the center and continue to roll. Brush a bit of the flour paste on the final corner to help seal the egg roll.

 Place egg rolls into heated oil and fry, turning occasionally, until golden brown. Remove from oil and drain on paper towels or rack. Put on serving plate and top with sesame seeds if desired.

One Year Ago:  The Best Banana Bread {I still maintain that this, really is, THE best banana bread}


Friday, February 18, 2011

Egg Drop Soup

My family, as you well know, just loves Chinese food.  One of my kids' absolute favorites is Egg Drop Soup. It is just so dang easy to make and it is something we typically have the ingredients on hand for, so we have it very frequently as a first course to a Chinese meal.  I have made many, many different recipes but I do think this was my favorite to date.  I really liked the taste of the ginger in it & the way the cornstarch thickened it, just a touch.  Give this a try!  You won't regret it!


Egg Drop Soup

5 cups chicken broth (low-sodium is best), divided
1/2 teaspoon ground ginger
2 green onions, finely chopped (chives are even better & what I like to use when I have my summer herb garden)
1/4 teaspoon salt
2 tablespoons cornstarch
3 eggs

Reserve 3/4 cup of chicken broth, and pour the rest into a large saucepan. Stir the salt, ginger and green onions or chives into the saucepan, and bring to a rolling boil. In a cup or small bowl, stir together the remaining broth and cornstarch until smooth.  Stir in the cornstarch mixture gradually until the soup is the desired consistency.  Bring to a boil, then reduce heat to medium-low.

In a small bowl, beat the eggs using a fork.  Add eggs slowly, stirring soup in clockwise direction with a wooden spoon.   Egg should cook immediately. 

Enjoy!


One Year Ago:  Pork Medallions with Olive-Caper Sauce (A family favorite!)

Wednesday, February 16, 2011

Oriental Fried Rice

I have been wanting to get this recipe for Fried Rice up for quite some time.  It is a total winner that will spoil you for even restaurant fried rice.  It is so easy and quick, not to mention everyone is always happy to see it on the table.  It tends to be one of those quick meals that I whip out on a busy night, so I have never gotten it photographed.  I had my crew around me, giggling at me taking my food pictures tonight (anxiously waiting to eat) so I didn't look closely at them.  Unfortunately, I see that they didn't turn out very good.  I will have to make it again and have a re-shoot!  I'm not waiting any longer to share though!  

As you will see, I have shrimp in the picture below, but not in the recipe.  I typically make this with chicken but tonight I only had one (very measly) breast so we had 1 chicken breast diced up and about 3/4 c. on small shrimp in the rice.  It was very good that way.  You can get creative and use leftover meat that you have on hand too!  Leftover pork tenderloin would be great!  


Oriental Fried Rice

 4 Whole Eggs, Slightly Beaten
4 Tablespoons Oil
2 whole Boneless, Skinless Chicken Breasts, Cut Into Small Pieces
4-5 whole Green Onions, Sliced (use White And Green Parts)
6 cups Cooked Rice (This is 2 cups raw,white rice)
3 Tablespoons Soy Sauce
1 teaspoons Sugar


Heat 1 Tbsp. oil in a skillet over high heat.  Quickly fry the chicken until browned, reduce heat to medium-high.  Add the rest of the oil and fry beaten eggs in oil until firm. Chop up the eggs as you cook them. In the same pan after egg is cooked, add onion; cook over medium heat for 2 minutes. Add cooked rice. Mix soy sauce with sugar and drizzle over rice. Cook for about 4 more minutes, stirring occasionally.

Serve with extra soy sauce, if desired.


Note: An absolute MUST when making fried rice, is to make your rice ahead of time and refrigerate for at least a couple of hours, but preferably overnight.  The reason for this is that it will turn the grains firm and get rid of excess moisture.  If you use freshly cooked rice, you will end up with a lumpy, goopey mess.  Remember, Fried Rice was invented as a way to use up leftover rice!  

Tuesday, January 18, 2011

One Pot Mac & Cheese

I am so excited, because I just found THE EASIEST recipe for mac & cheese (that doesn't come from a blue box).  Yes, there are fancier and tastier recipes out there, but this one is PERFECT for a quick lunch.  My kids gobbled it up, I think it was one of their favorites.  This is going to be my new go-to recipes for the quick lunchtime macaroni.  Can't beat it!  Just a few ingredients, one pot, quick, and TASTY!  This also fits right in with my post from yesterday, about minimizing the processed ingredients in our diet and cooking more from scratch!

Picture will be coming soon...next time I make it!  I didn't have my camera handy at lunchtime today but I didn't want to forget where I got this recipe, so I am posting it anyway!

One Pot Mac & Cheese

4 cups water
2 cups milk
4 chicken bouillon cubes
1 lb. macaroni noodles (or other small pasta)
3 cups cheddar cheese, shredded

In a large saucepan, mix water, milk, bouillon, and pasta. Bring to a boil and let it simmer, stirring occasionally, until nearly all of the liquid is gone and the pasta is tender (about 10 minutes). Remove from heat and stir in cheese. Enjoy!

Makes 6 servings

Tuesday, August 24, 2010

Fettuccine Alfredo


Last night, I made Fettuccine Alfredo.  Don't let the simplicity of the recipe fool you, it was incredibly delicious.  Often times, simple is best.  Because my boys feel like they must have meat with every meal, I marinated 2 chicken breasts in Zesty Italian salad dressing for 3-4 hours and grilled them.  I then sliced them and served it on top of the Fettuccine Alfredo.  The chicken was delicious with it, but not really necessary, in my opinion.  You just go ahead and do whatever floats your boat.  

Here is what you need to get started, a mere 6 ingredients:


Fettuccine Alfredo

1 lb. Fettuccine Noodles
1 stick Butter
1 c. Heavy Cream
Salt & Pepper, to taste
2 c. Freshly Grated Parmesan Cheese

Cook pasta according to package directions.  

In a saucepan or skillet, warm butter and cream.  Season with salt and freshly ground black pepper.  

Grate Parmesan cheese and place half of it into a large serving bowl.  Pour warm butter/cream mixture over the top.  

Drain pasta and immediately pour it into the bowl.  Toss a couple of times, then sprinkle in the other half of the Parmesan.  

Toss to combine, thinning with pasta water if necessary.  Serve immediately as a main course or an accompaniment to meat or salad.  

Source: PW

Monday, August 9, 2010

Potato Bundles

These potato bundles are the perfect side dish for grilled meats.  This is, obviously, the picture taken right before they were wrapped up in the foil and baked (they would also be perfect for throwing on the grill).  Unfortunately, I didn't get an after-photo taken.  My oldest son LOVED these.  I don't often get compliments from him, so that makes these a definite keeper.

Potato Bundles

6 whole Russet potatoes (I was out of Russets, so I had to use red)
1/2 whole yellow onion, diced
1 stick butter
1/2 c. heavy cream
Kosher salt to taste
Paprika to taste
Freshly ground black pepper, to taste
2 Tbsp. minced parsley 
8 squares tinfoil 

Pile potatoes and onions on a squares of foil.  Add 1 Tbsp. butter.  Splash on cream.  Then, sprinkle on salt, paprika, and black pepper.  Sprinkle minced parsley over the top.  

Wrap bundles tightly and bake at 375 degrees for 45 minutes or until extremely tender.

Serve bundles right on the dinner plate.

Source: PW

Thursday, July 22, 2010

The Second Installment of Zucchini Invasion: Baked Zucchini with Mozzarella

I had a bit of trouble sleeping last night, so please excuse me if I am incoherent.  Every once and a while, I just CANNOT fall and stay asleep.  Last night was one of those nights:-(  I have almost made it through today, and I am hoping I saw some major logs tonight.

Anyway, I wanted to get my next newly found delicious zucchini recipe up (just in case anyone besides me has them coming out of there ears right now).  Everyone in my house really liked this one, except a certain 11 year old that decided he didn't like it (because it was zucchini) before he even tried it.  It reminded me of Garlic Bread (without all the guilt!)


Baked Zucchini with Mozzarella 

2 medium or 5 small, zucchini
2 c. shredded mozzarella cheese

Slice your zucchini up into 1/2 inch rings.  Lay them out flat on a cookie sheet.  Sprinkle with Johnny's Garlic Seasoning and a bit of salt.  Now, I didn't have this seasoning, so I used some Lawry's Garlic Salt I had on hand and it worked great, but DO NOT add salt too if you do this!  

Bake in the oven at 350 degrees for 10-15 minutes or until zucchini is crisp-tender.  

Take the hot pan out of the oven and sprinkle the zucchini with mozzarella cheese.  Place the cookie sheet back into the oven, and let the cheese get all bubbly and a bit browned (3-5 minutes).  Watch carefully!  Things go from fine to burnt to a crisp quickly under the broiler!  

Source: Thank you so much for the recipe Jamie Cooks It Up!

Friday, May 21, 2010

Warm German Potato Salad

This recipe for Warm German Potato Salad makes a fantastic year round side-dish.  We had it this week with grilled brats and sauerkraut (homemade and canned my my MIL YUM!) but it would also be just as fantastic with a pork roast in the dead of winter.  

This is not the type of German Potato Salad that I grew up with, my grandma made a version that is also delicious, but it is quite different.  I do think I prefer this salad warm, but my grandma's cold.  

Warm German Potato Salad

3 lbs. small (2 inch diameter) red boiling potatoes, peeled if desired
10 bacon slices (1/2 lb.), cut into 1/4-inch-wide strips
1 large onion, chopped
1/2 tsp. sugar
3 Tbsp. cider vinegar
3/4 c. beef stock or store-bought broth
2 Tbsp. chopped fresh flat-leaf parsley
1/2 tsp. salt (or to taste)
1/8 tsp. freshly ground black pepper (or to taste)
Garnish with additional parsley (optional)

Combine potatoes with cold salted water (1 Tbsp. salt per every 4 Qts. water) to cover by 1 inch in a 6 Qt. pot, bring to a simmer, and simmer until just tender, about 20 minutes.

Meanwhile, cook bacon in a large heavy skillet over moderate heat, stirring, until browned and crisp, about 10 minutes.  With a slotted spoon, transfer to paper towels to drain.  Set skillet aside.

Drain potatoes.  When just cool enough to handle, cut crosswise into 1/4-inch-thick slices.  Transfer to a large bowl, add bacon, and cover to keep warm.

Pour off all but 3 Tbsp. fat from skillet.  Add onion and cook over moderately high heat, stirring, until softened, about 3 minutes.  Add sugar, 2 Tbsp. vinegar, and stock, bring to a simmer, and simmer until slightly reduced, about 3 minutes.

Add onion mixture to potatoes, along with parsley, remaining 1 Tbsp. vinegar, salt, and pepper, and toss gently.

Serve potato salad warm or at room temperature, sprinkled with additional parsley, if desired.

Source: The Gourmet Cookbook

Thursday, May 13, 2010

Tortellini Salad

I just can't wait any longer.  I must post the recipe for one of my new favorite summertime pasta salads that my entire family loved.  It is even healthy!  I know, I know, you are very welcome.  This is another one from my Cooking Light Five Star Recipes cookbook that cannot be found ANYWHERE on the web.  I am kind of feeling like I have some very important secrets to share with you from this awesome cookbook.    

This salad is also just gorgeous, don't you think?


Tortellini Salad

9 oz. package fresh cheese tortellini, uncooked (I usually buy the frozen variety which also do work just fine)
2 c. (2-in) julienne-sliced zucchini
1 c. cherry tomato halves
1/2 c. chopped sweet red pepper
1/3 c. sliced green onions
2 Tbsp. grated Parmesan cheese
1/3 c. fat-free red wine vinaigrette (I couldn't find anything but regular at my crappy Walmart, so that is what I had to use)
1 1/2 tsp. chopped fresh dillweed (I used about 1 tsp. of dried)
1/4 tsp. pepper

Cook tortellini in boiling water 6 minutes, omitting salt and fat; drain.  Rinse under cold running water, and drain well.  Combine tortellini, zucchini, and next 4 ingredients in a large bowl.  Combine vinaigrette, dillweed, and 1/4 tsp. pepper; stir well.  Pour over tortellini mixture; toss gently.

Makes 6- 1 c. servings

Monday, May 10, 2010

Sweet Restaurant Slaw

Because I am utterly sick of carpet shampooing and want an excuse for a break while I drink my diet coke, I am going to post a second recipe today.  Why am I carpet shampooing, you ask?  Well, that would be because my daughter got her hands on some tempera paints and COVERED her bedroom carpet in it.  I have a home shampooer, but after about 1/2 hour of shampooing I ran and rented a more powerful one.  2 1/2 hours later, I can say that it looks much better, but I still have a long way to go on getting it out.  I am thinking I won't be totally getting it out, not with her white carpet:(  In the grand scheme of things, it IS just carpet.  I guess we will just live with our imperfect, spotted carpet (this isn't the first mishap) and replace it when the kids are a bit older and less...accident prone/destructive.

I love a good coleslaw, especially in the summer.  I haven't found one the rest of my family really enjoys.  That is until this one.  Everyone loved it and even wanted seconds.  I didn't even get any leftovers the next day!


Sweet Restaurant Slaw

16 oz. bag coleslaw mix
1/4 thinly sliced red onion
2/3 c. Light Miracle Whip
3 Tbsp. Canola Oil
1/2 c. white sugar
1 Tbsp. white vinegar
1/4 tsp. salt
1/2 tsp. poppy seeds

Combine the coleslaw mix and onion in a large bowl.

Whisk together the Miracle Whip, oil, sugar, vinegar, salt, and poppy seeds in a medium bowl; blend throughly.  

Pour dressing mixture over coleslaw and toss to coat.  Chill at least 2 hours before serving.

LinkWithin

Related Posts with Thumbnails